 100% COTTON FABRIC
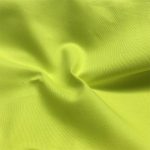 COTTON STRETCH FABRIC
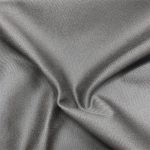 POLYESTER/COTTON FABRIC
 OTHERS FABRIC
When you put on a piece of clothing, have you ever thought about how strict the test of its fabric has gone through to come to you? Have you ever wondered what secrets and stories lie behind those seemingly ordinary fabrics? Fabric, this seemingly ordinary element, actually carries countless mysteries and wonderful. From delicate silk to gorgeous cloth, from tough fibers to soft touch, each fabric has its own unique properties and characteristics. And these performance and characteristics, it is through a series of rigorous and scientific test indicators to measure and evaluate. In the textile field, the quality and performance of fabrics are crucial, and a series of scientific tests are the key to ensuring quality. In the next chapter, let’s explore the fabric test indicators to discover the key factors that determine the quality, comfort and durability of fabrics.
Fabric Testing Indicators
Physical Performance Tests
Yarn Density Test
Warp Density and Weft Density:
- Tools: Counting Glass or Microscope
- Method:
- Select several different areas on the fabric, with each area typically measuring 10 centimeters.
- Observe the selected length under the microscope and count the number of warp and weft yarns.
- Calculate the yarn density per centimeter.
- Take the average of multiple measurements as the final result.
Weight (GSM) Test
- Tools: Sample Cutter, Precision Balance
- Method:
- Use the sample cutter to cut a standard area (e.g., 100 cm²) from the fabric.
- Weigh the sample using a precision balance.
- Calculate the weight in grams per square meter (GSM).
Thickness Test
- Tools: Thickness Gauge
- Method:
- Place the fabric sample under the measuring head of the thickness gauge.
- Apply the specified pressure (usually 2 kPa).
- Read the thickness value.
- Repeat the measurement at multiple locations and take the average as the final result.
Abrasion Resistance Test
- Tools: Martindale Abrasion Tester or Taber Abrasion Tester
- Method:
- Cut the sample into the specified size (e.g., 38 mm diameter circle).
- Fix the sample on the tester.
- Apply the specified pressure (e.g., 9 kPa).
- Start the tester to rub the sample against the abrasive material according to the prescribed path.
- Record the number of abrasion cycles or the extent of wear.
- Evaluate abrasion resistance, usually expressed by weight change or appearance change of the sample.
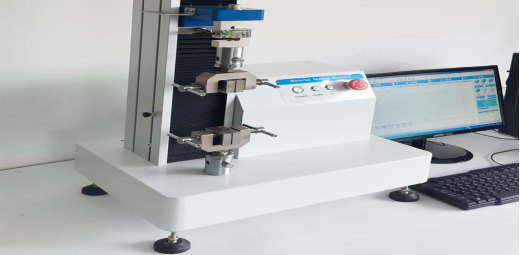
Mechanical Performance Tests
Tear Strength Test (Elmendorf Method)
- Tools: Elmendorf Tear Tester
- Method:
- Sample Preparation: Cut the fabric sample to the specified size, generally 7.5 cm x 10 cm (warp or weft direction). Pre-cut a small notch, usually 20 mm.
- Install the sample on the tear tester, ensuring the notch is at the blade position.
- Release the pendulum of the tester to tear the sample at a constant speed and force. The instrument records the force needed to tear the sample.
- Read the tear strength value in Newtons (N) from the instrument. Repeat the measurement and take the average as the final result.
- Note: The sample direction should be tested as needed (warp or weft). Use a new sample for each test.
Tear Strength Test (Trouser Method)
- Tools: Tensile Tester
- Method:
- Sample Preparation: Cut the fabric sample to the specified size, generally 20 cm x 5 cm. Cut a notch at one end to form a “trouser” shape, with each “leg” about 2.5 cm wide.
- Install the sample with the two “legs” clamped in the upper and lower fixtures of the tensile tester, ensuring the notch is in the middle.
- Stretch the sample at a constant speed (e.g., 100 mm/min) and record the force during tearing. The tensile tester displays the force needed to tear the sample.
- Record the maximum force value during tearing. Repeat the measurement and take the average as the final result.
- Note: Ensure accurate cutting and installation of the sample for uniform force distribution.
Appearance and Dimensional Stability Tests
Washing Fastness Test
- Tools: Launderometer
- Method:
- Sample Preparation: Cut the fabric to the specified size (e.g., 10 cm x 4 cm). Take a standard adjacent fabric (cotton or polyester-cotton blend).
- Sew the fabric and adjacent fabric together to form the test sample.
- Washing Process: Place the test sample in the launderometer. Follow the standard procedure, including specific temperature, time, mechanical action, and detergent concentration.
- Drying and Evaluation: Dry the sample after washing. Use a grey scale to compare the color change before and after washing and rate the color fastness (1-5, 5 being the best).
- Note: Follow standard washing conditions strictly, including temperature, detergent type and concentration, time, etc. Use standard light sources for evaluation.
Rubbing Fastness Test
- Tools: Crockmeter
- Method:
- Sample Preparation: Cut the fabric to the specified size (e.g., 14 cm x 5 cm).
- Fix the sample on the crockmeter. Use a dry rubbing head or wet rubbing head (moistened standard white cotton cloth).
- Rubbing Process: Start the crockmeter to rub the sample for the specified number of cycles (e.g., 10 or 20 cycles).
- Evaluation: Remove the white cotton cloth from the rubbing head and use a grey scale to compare the color change, rating the color fastness (1-5, 5 being the best).
- Note: Ensure the cotton cloth on the rubbing head is properly moistened for wet rubbing. Use standard light sources for evaluation.
Light Fastness Test
- Tools: Xenon Arc Light Fastness Tester
- Method:
- Sample Preparation: Cut the fabric to the specified size (e.g., 10 cm x 4 cm).
- Fix the sample on the tester’s sample holder.
- Light Exposure Process: Start the tester and follow the standard procedure for light exposure, including specific light source, temperature, and humidity control.
- Evaluation: After light exposure, use a blue scale to compare the color change before and after exposure and rate the light fastness (1-8, 8 being the best).
- Note: Follow standard light exposure conditions strictly, including light source type, light intensity, time, etc.
Shrinkage Test
- Tools: Washing Machine, Dryer, Measuring Tape
- Method:
- Sample Preparation: Cut the fabric to the specified size (e.g., 50 cm x 50 cm). Mark the test points on each side and record the initial dimensions.
- Washing and Drying Process: Wash and dry the sample according to the standard procedure, including specific temperature, time, detergent concentration, etc.
- Measure Size Changes: After washing and drying, lay the sample flat without stretching. Measure the dimensions at the marked points again and record the post-wash dimensions.
Comfort Tests
Air Permeability Test
- Tools: Air Permeability Tester (e.g., FX 3300)
- Method:
- Sample Preparation: Cut the fabric to the specified size (e.g., 20 cm x 20 cm).
- Fix the sample in the air permeability tester’s sample holder.
- Testing Process: Start the tester and set the specified pressure difference (e.g., 100 Pa). Measure the volume of air passing through the sample per unit time.
- Read Data: Air permeability is usually expressed in L/(m²·s) or cm³/(cm²·s).
- Note: Ensure the sample is flat and wrinkle-free. Do not stretch the sample during installation. Maintain standard environmental conditions (temperature 20±2°C, relative humidity 65±2%).
Moisture Permeability Test
- Tools: Moisture Permeability Tester (e.g., Cup Method Tester)
- Method:
- Sample Preparation: Cut the fabric to the specified size (e.g., 10 cm x 10 cm).
- Fix the sample on the moisture cup containing distilled water or desiccant.
- Testing Process: Place the moisture cup in a controlled temperature and humidity chamber, set at specified conditions (e.g., 23°C and 50% RH). After a specified time (e.g., 24 hours), measure the weight change of the moisture cup.
- Calculate Moisture Permeability: Expressed in g/(m²·24h), calculated based on the weight change and sample area.
- Note: Ensure a proper seal during sample installation to avoid air leakage. Strictly control the testing environment’s temperature and humidity.
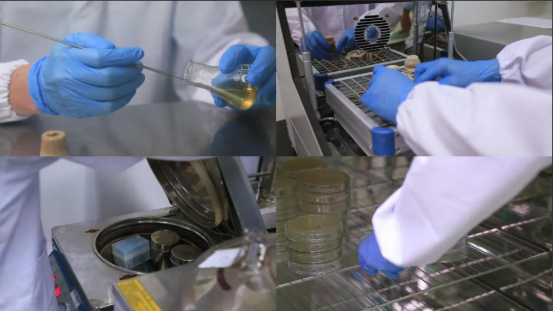
Chemical Performance Tests
pH Value Test
- Tools: pH Meter, Distilled Water
- Method:
- Sample Preparation: Cut the fabric to the specified size (e.g., 5 cm x 5 cm). Place the sample in a beaker and add a specified volume of distilled water (e.g., 100 ml).
- Soaking Process: Soak the sample at room temperature for 1 hour, stirring occasionally.
- Measure pH Value: Use the pH meter to measure the pH value of the solution.
- Note: Maintain a consistent ratio of distilled water volume to sample area. Calibrate the pH meter before use.
Formaldehyde Content Test
- Tools: Formaldehyde Detector, Extraction Solution (e.g., distilled water or specific solvent)
- Method:
- Sample Preparation: Cut the fabric to the specified size (e.g., 5 cm x 5 cm). Place the sample in a beaker and add the specified volume of extraction solution (e.g., 100 ml).
- Extraction Process: Soak the sample at the specified temperature (e.g., 40°C) for the specified time (e.g., 1 hour), stirring occasionally.
- Measure Formaldehyde Content: Use the formaldehyde detector to measure the formaldehyde content in the extraction solution, usually expressed in mg/kg.
- Note: Maintain a consistent ratio of extraction solution volume to sample area. Calibrate the formaldehyde detector before use.
Summary
- Comfort and chemical performance tests are crucial indicators for evaluating the quality and safety of cotton woven fabrics. Air permeability and moisture permeability tests assess the comfort of the fabric, ensuring breathability and sweat-wicking performance during wear. pH value and formaldehyde content tests focus on the chemical safety of the fabric, ensuring it is harmless to humans.
- These tests need to be conducted under standard environmental conditions (temperature 20±2°C, relative humidity 65±2%) to ensure the accuracy and comparability of results. Each test strictly follows standard operating procedures, including sample preparation, testing process, and result evaluation, to ensure that the results accurately reflect the fabric’s performance.